When a student is marked as absent for all their rolls in any school day, an unexplained absence is created that must be actioned, which should ideally be done by the parents through the parent portals, however if you receive a written note you can enter that verification into edumate following this tutorial.
Technically if absences have lapsed by more than 7 days they are supposed to remain in the system as unexplained, but admin staff may at their discretion provide absence verifications under certain circumstances.
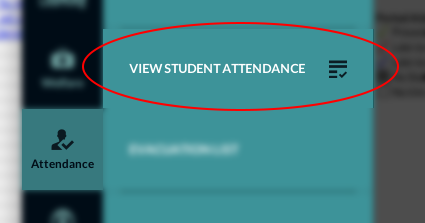
1. In Edumate, click on ‘Attendance’ then ‘View Student Attendance’.
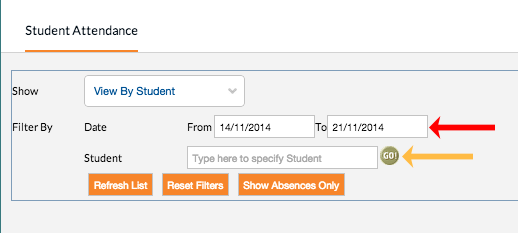
2. Change the from and to dates (red arrow below) to cover just the date(s) of the absence you wish to create for an individual student. Then type the student into the ‘student’ box (yellow arrow below) to display the absences for that student within the specified date range.
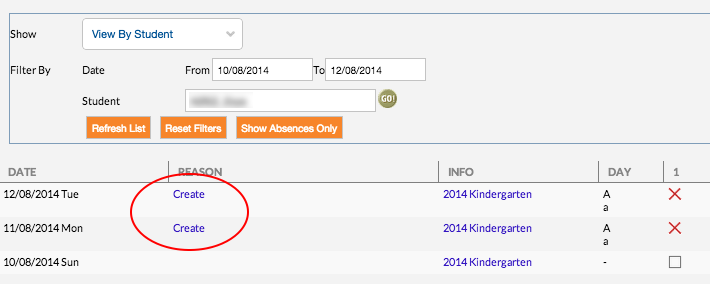
3. You should see any unexplained absences in a list with a ‘create’ link under the ‘reason’ heading (circled in red below). Click on any of the ‘Create’ links.
eg: In the below example an absence covered 2 days, so we have put the date range to cover a couple of days, and thus have multiple ‘create’ links appearing (for each day of absence), it is only necessary to click on one of these as you can create a single absence reason that covers multiple days in the next step.
4. To create the absence verification, choose the type of verification from that option (red arrow below). Choose which dates this reason covers (red circle below – for each whole day of absence you will see 2 rows that need ticking here as they are flagged as absent for both the morning and the afternoon). Then choose a ‘Reason’ for the absence (yellow arrow below), and finally click ‘Save and Exit’ (circled in green below).
You may also add extra details in the details box if appropriate.

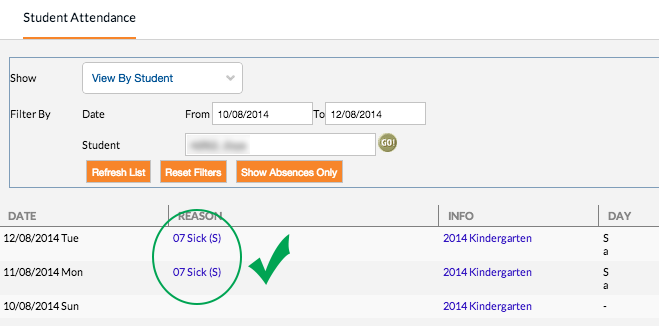
5. You should be taken back to the ‘View Student Attendance page’ and see the reasons updated to what you set in the previous step (circled in green below). You do not need to do any more here, this shows that the reasons have been successfully created and you can proceed to do more absences.