
This tutorial will explain how to install Adobe Creative Cloud on your MacOS BYOD device – from which you can install any adobe application such as Photoshop, Illustrator, Indesign etc.
1. Download the Adobe Creative Cloud macOS application using the following link:
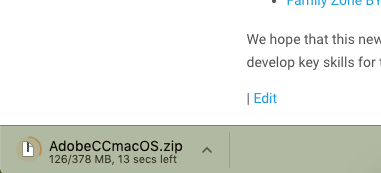
2. The installer will download – this may be visible in different parts of your browser depending on the browser and may take a while, examples shown below.
In Safari:
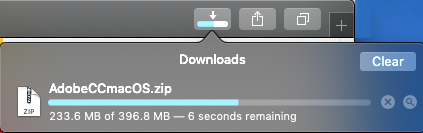
In Google Chrome:
3. Once the download has finished, open the ‘Finder’.
![]()
In the finder, click ‘Downloads’ under favourites in the left column. You may need to double click the file ‘AdobeCCmacOS.zip’ (green arrow below) to show the installer (red arrow below), then/otherwise double click the installer itself (red arrow below)

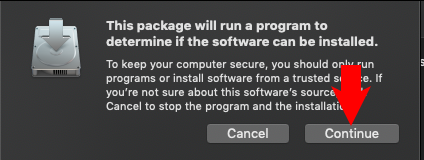
4. If you have a recent Mac device, you will get a security warning as shown below saying that the installer can’t be opened.
Follow the steps below to run the installer (all these steps are demonstrated in the video below):
i. Click ‘OK’ in the window with the warning saying that Adobe CC can’t be opened
ii. Click ‘Applications’ from the left column
iii. Scroll down and double click ‘System Preferences’
iv. Click the ‘Security & Privacy’ icon
v. Click the ‘general’ tab
vi. Click ‘Open Anyway’ in the bottom right of the window
vii. Finally, click ‘Open’ in the window that pops up.

5. Click ‘Continue’ when the installer opens.
You might be prompted to enter a username and password – this is the username and password you use to log into your computer. (If you don’t have administrator rights to install applications, you may need to get your parents to enter their username / password)

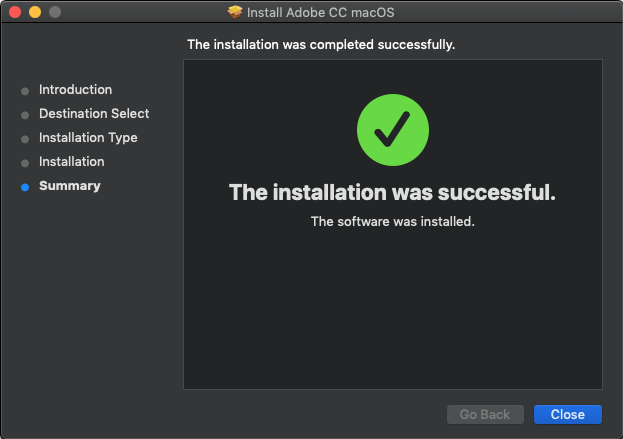
6. Follow the prompts on the installer to install Adobe CC.

When the installer finishes it will prompt you, click ‘Close’.
7. Open the ‘Finder’ again.
![]()
Click on ‘Applications’ from the left column, double click on ‘Adobe Creative Cloud’ which will open another folder, then double click on the ‘Adobe Creative Cloud’ application (as shown below).

8. After a short wait, you should see the Adobe CC cloud icon appear in your taskbar as shown below.

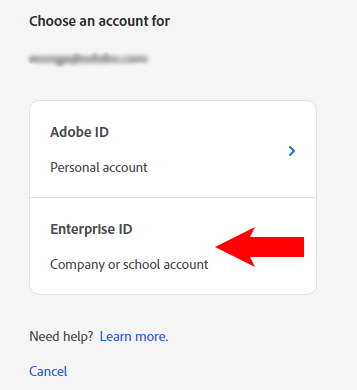
9. Click on the Adobe CC icon from the taskbar, then type in your student email address into the username field. When you click into the password field you should be redirected to the login in step 11 below.

If you see the below prompt after typing in your email address, choose ‘Enterprise ID’.
* If you get an error advising that your username / password is incorrect, please see the IT department for further assistance.
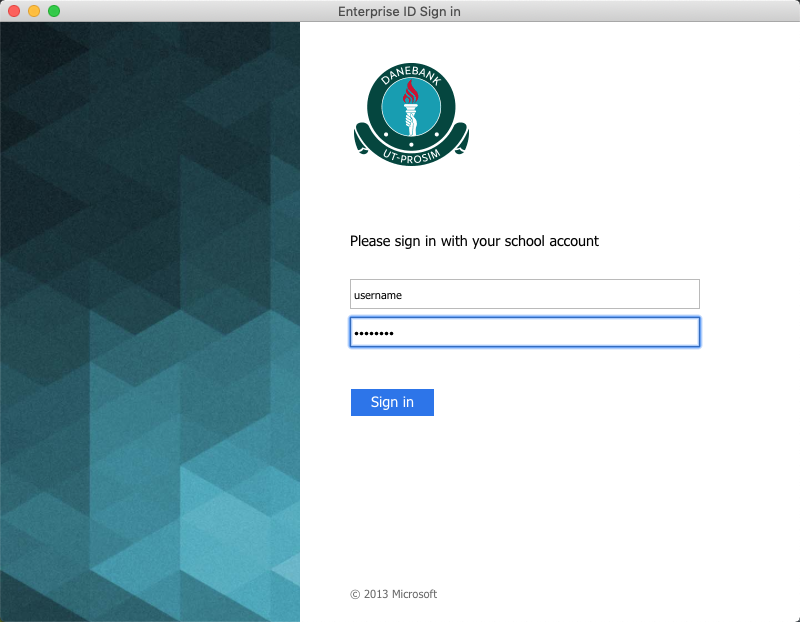
10. Enter your school username and password.
11. When you first log in, the Adobe CC application may update itself – wait for it to finish, after which it will close and re-open after a couple of minutes. If it hasn’t re-opened after around 5 minutes, restart your mac and you should see the icon appear again in the top taskbar.

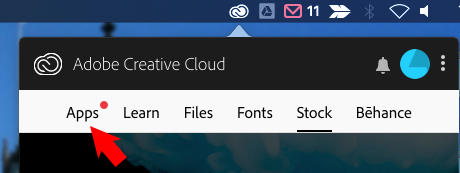
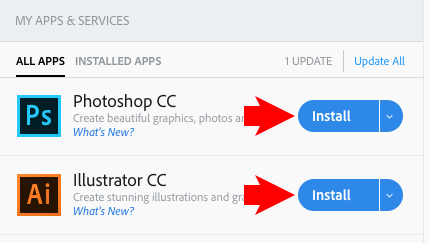
12. Click the Adobe CC icon from the taskbar again, after a small wait click on the ‘Apps’ tab that appears.
13. You will see a list of all the available licenced applications, click install on any application to install it, and once it is installed you can also open the application from here.
N.b. Adobe applications take up a lot of space on your device, so only install what you need.
* If you see ‘Try’ instead of ‘Install’ next to the application you need, please see the IT department for further assistance.