What is this for ?
Apple does not allow more than 1 computer to be synchronised with an iPad, iPhone or iPod. Once you connect it with a computer and registered, it is bound to that computer. If you try to connect it to another computer it will tell you that your device will be wiped – unless, you follow these instructions.
Open iTunes on your computer. If not installed, download from www.itunes.com
Plug in your iPad with the USB cable. The first time you plug in your iPad it will take a while to install.
This may pop up:
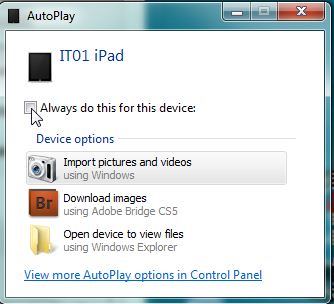
Just click the red cross in the upper right corner to close the Window. If you would like this message removed permanently, please follow the “Remove AutoPlay” How-to.
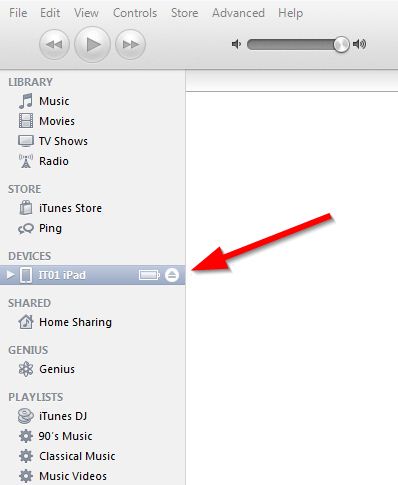
You will know iTunes is ready when the iPad is displayed on the right hand side. See below.
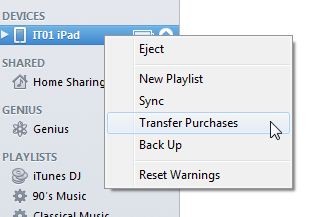
We will back up the iPad first. To do this, right click with your mouse on the iPad name and a menu will appear as below. Click on “Back Up”
The backup will begin and show a progress bar at the top to let you know when it’s finished.

After the backup completes, right click on the iPad name again and click on “Transfer Purchases”
This message will appear, click on the “Authorize” Button.

iTunes now needs the account email and password you used to register your Pad. This is not your Danebank username and password you use on the school computers. If you have forgotten your password, you will need to click on “Forgot Password” and follow the instructions. Otherwise, enter your password and click on “Authorize” to continue.
If successful it will display the following message. Click “OK”
Note: It may say “You have authorised 2 computers out of your available 5”. This is normal.
This will now begin a process and will show a progress bar at the top of iTunes. See below. Please allow the progress bar to complete before proceeding.

Apps
When this process is finished and the progress bar is gone, you are now able to synchronise your applications. Click on the “Apps” tab just below the top of the iTunes program.

Now click on the “ Sync Apps” button.

A message will appear as below. Click “Sync Apps”

This completes the Synchronisations of the Applications on your iPad. This means you can now download apps in iTunes or the iPad and they will copy across to each other. This also means that all your apps are being backed up every time you synchronise.
iBooks
To synchronise your iBooks please note the following before proceeding.
iTunes does not keep any PDF document when you synchronise on another computer. So if you still have your old computer functional, you should plug in your iPad to it and back up all your PDF’s before proceeding. If you have PDF documents in iBooks only and your old computer is not functional I suggest you write down each PDF and be prepared to download each one again. This is just for PDF’s you’ve downloaded off websites not Books you have bought. If you aren’t sure if you’ve got PDF’s in your iBooks, do the following to check.
On the top left corner, press the “Collections” button and then “PDFs”
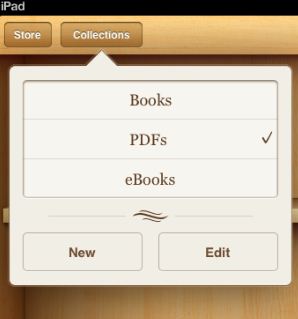
If you can see books on the shelf then you have PDFs on your iPad. These will be lost if you continue with this process.
If so please save them if your original computer is working or write down the names so you can download them again after this is complete.
To proceed with the iBooks synchronisation, click on “Books” in the menu at the top of iTunes.
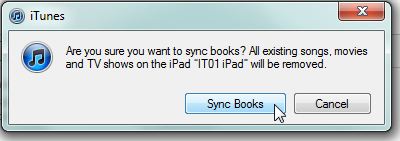
Click on “Sync Books”
The following message will appear, click “Sync Books”
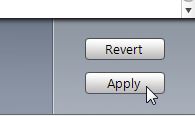
Click on the “Apply” button at the bottom right.
The top progress bar will appear, although usually briefly and you may not notice it. Books are very small in size and don’t take long to synchronise. If you have many books you may see a longer progress bar. Just wait till the following message appears to be certain the process is complete.
This completes the Synchronisation of your iBooks.
Photos
If you like to synchronise your photos with iTunes please follow these instructions.
Click on the top menu bar where it says “Photos”
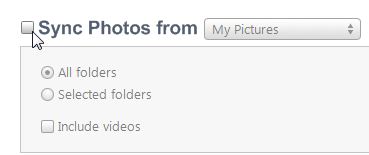
Click on “Sync Photos”
Click on “Apply” on the bottom right of application.
The progress bar will appear on the top of the iTunes screen and will display the following when it’s complete.
Your photos are now synchronised with iTunes.
Please note: If you delete a photo from your computer and then synchronise with iTunes, it will delete on your iPad also. Anything you add, change or remove in your computer in your Pictures folder will reflect the same on your iPad when you plug it in and synchronise.
Music
If you synchronise your music you will replace the music that is on you iPad with what is in your iTunes library. Before you do this procedure, I suggest you first check your iTunes library and see if the music you want is there. If it’s not there then the iPad will be erased to match the empty library in iTunes. The good news is that if you bought music then it can be re-downloaded for free.
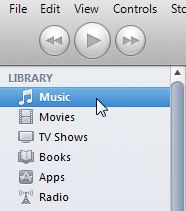
Please note the next picture for location of the music library in iTunes.
The iTunes library is located on the top right.
To Synchronise your music please follow these instructions
Click on the “Music” tab in the top menu.
![]()
Click on the “Sync Music” button.
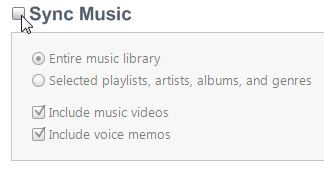
Click on the “Apply” button on the bottom

The progress bar on the top of the screen will show the following when complete:

Very Important: To ensure the longevity of your iPad you must “eject” the iPad BEFORE unplugging it from the computer. After clicking the the eject the iPad will disappear. See below.
